Building and Installing our Shipping Container Racking Kits
How to install our shipping container racking kits
Our industrial grade shipping container racking and shelving kits are an extremely popular addition to our range of shipping containers. Designed into neat kits, these self build shelving units come with a massive 600 Kgs UDL (Uniformly Distributed Load) capacity per shelving unit. This is commonly 2-4x the capacity that other shipping container firms offer at a very similar overall price. In this guide we detail how to install our shipping container racking when taking then as a self build option.
Our racking will arrive flat packed, and if you ordered racking for a whole shipping container it may well come in a single small pallet much like the first picture shown below. As standard (unless you specify different colour options) our uprights will be blue and the shelf supports are all orange.
We have our how to guide written up below, but you may also find this short instructional video helpful:
Step 1 is to unpack the parts for a single shelving unit. Based on a 4 shelf rack you should have:
- 4x shelf uprights
- 8x front and back shelf supports
- 8x side shelf supports
- 4x centre shelf supports (whilst similar size to the side supports these are obviously very different construction and have small panels on the ends of each support)
- 4x chipboard shelves
- 4x plastic feet and 4x plastic toppers for the uprights
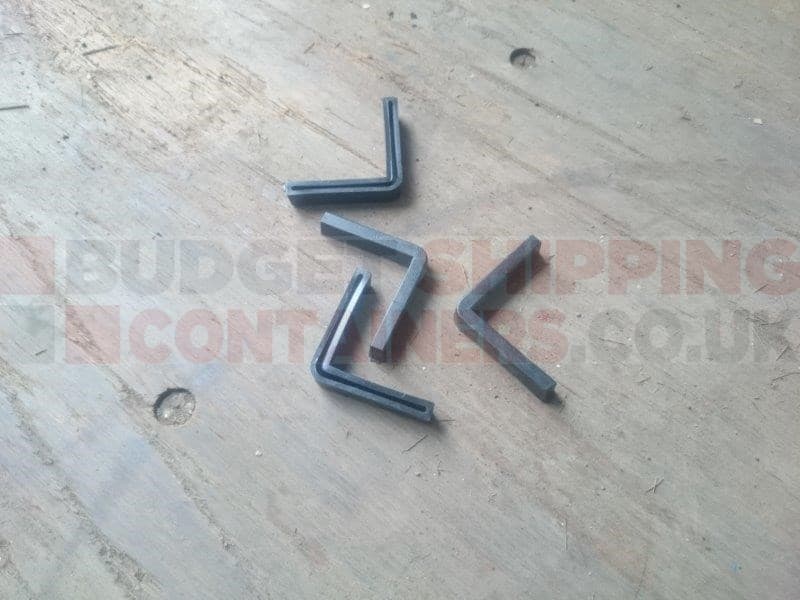
- If ordering multiple shelving units you may also see s small square ‘tie plate’ this is to allow you to secure one shelving unit to the next in a row for extra stability.


We recommend to get everything out and checked before you start. Very occasionally the warehouse may miss a small part or something may have been damaged in transit. We can of course get a replacement sent to you FOC, but you may wish to double check you have all the pieces before you start assembly.
Step 2: build one larger side (the front or back).


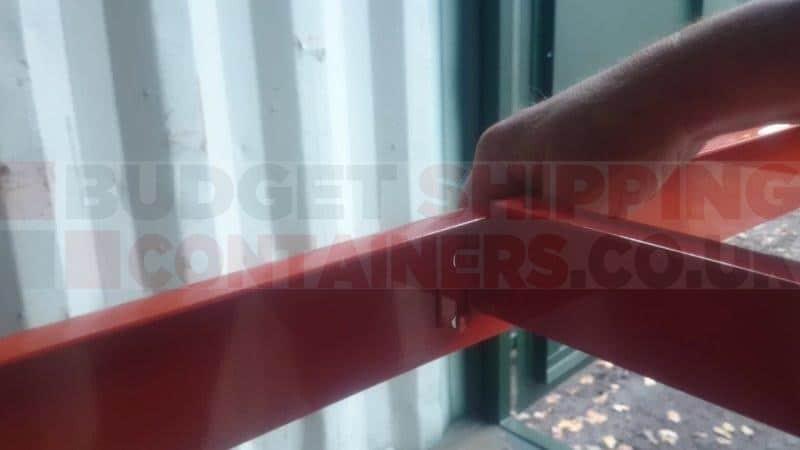
Lay out 2 of your upright supports on the floor. Take 4 of your front and back shelf supports and slot these into place in the uprights. You can choose where your shelves will go, however the top shelf should always be fitted to the top of the uprights to ensure the shelf is as rigid as stable as possible. Double check you are fitting these level. We found when building these it easiest to count the holes between shelves to ensure you leave the same gap or space between shelves on each of the uprights. Whilst you can choose where the shelves go, please be aware that you will need to have 8 ‘holes’ between shelves to give enough space to get the chipboard shelves into place – otherwise you may need to fit the chipboard shelves in at the start of the process and not at the end as we’ve listed here.
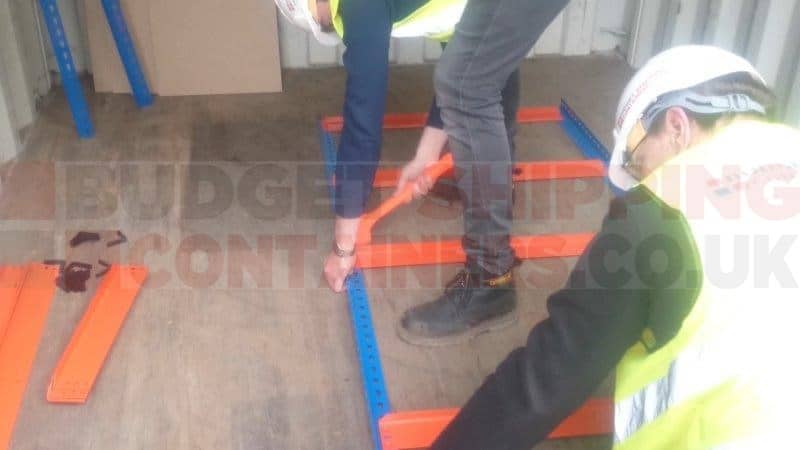
Once in position you can use a mallet to push each of the shelf supports into place within the uprights. These are then secure (ensure each shelf support is pushed right down as far as it can go into the hole in the shelf upright).
Step 3: Repeat this with the other large side, meaning you have a front section for your shelving unit made up as well as a back section, but as yet no sides. Of course you do not have to build this in the order we did, but after fitting out a 10ft container with 7 shelving units we found this to be up there with the quicker and easier methods.
Step 4: Holding the front and back of the shelving units upright, slot and then mallet into place the side supports. We found fitting a middle shelf first at an easy to work at height (then doing top and bottom) was easier. Once finished you now have your outer frame for the shelving unit finished and this is starting to look like a shelving unit.


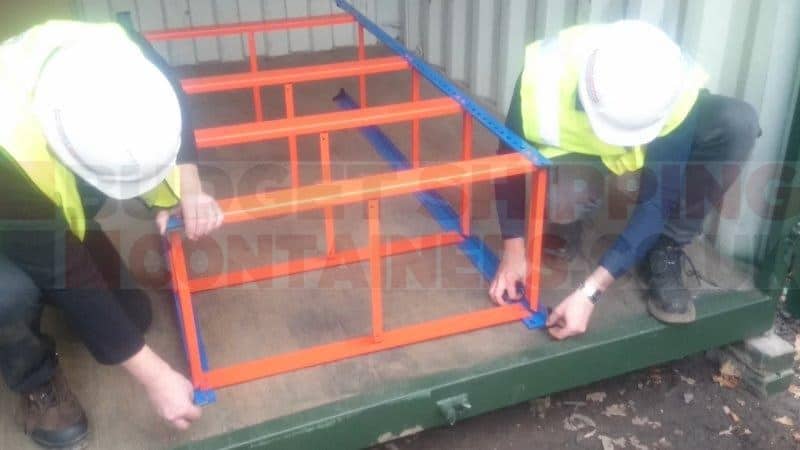
Step 5: Add the centre supports. These – like everything else – slot into place and then need a mallet to secure them. Ensure all the supports (front, back and centre) are all level for each shelf.
Step 6: Add your plastic feet, plastic toppers and tie plates (if applicable).
Step 7: Take each chipboard shelf and slot it into place. for middle shelves you will need to angle the chipboard to get it into position. Congratulations you are then finished! (Unless you have more shelving units to build…)
We found that our first rack took us approx 40 mins with 2 people and no practice, after a short amount of practice (2 shelving units) we have this down to approx 20 minutes per shelving unit.


Budgetshippingcontainers.co.uk offer the UK’s largest online range of shipping containers for sale with a nationwide network of storage and conversion yards and crane equipped delivery vehicles.
If you need a shipping container feel free to browse our online range of shipping containers for sale. You can also call us on freephone 0808 1234 215 any time 9am – 5pm weekdays and our team will be happy to discuss your requirements. Alternatively, you can use our online shipping container quote form or request a telephone callback. In both cases we aim to get back to you within 1-2 working hours (may take longer for more detailed quotes).